Editor tour
A guided look at the editor window: menus, the mode bar, tabs and unsaved markers, saving, undo, the Settings dialog, navigation history and pop-out windows.
10 min read
The window at a glance#
With a project open, the editor window is four horizontal bands:
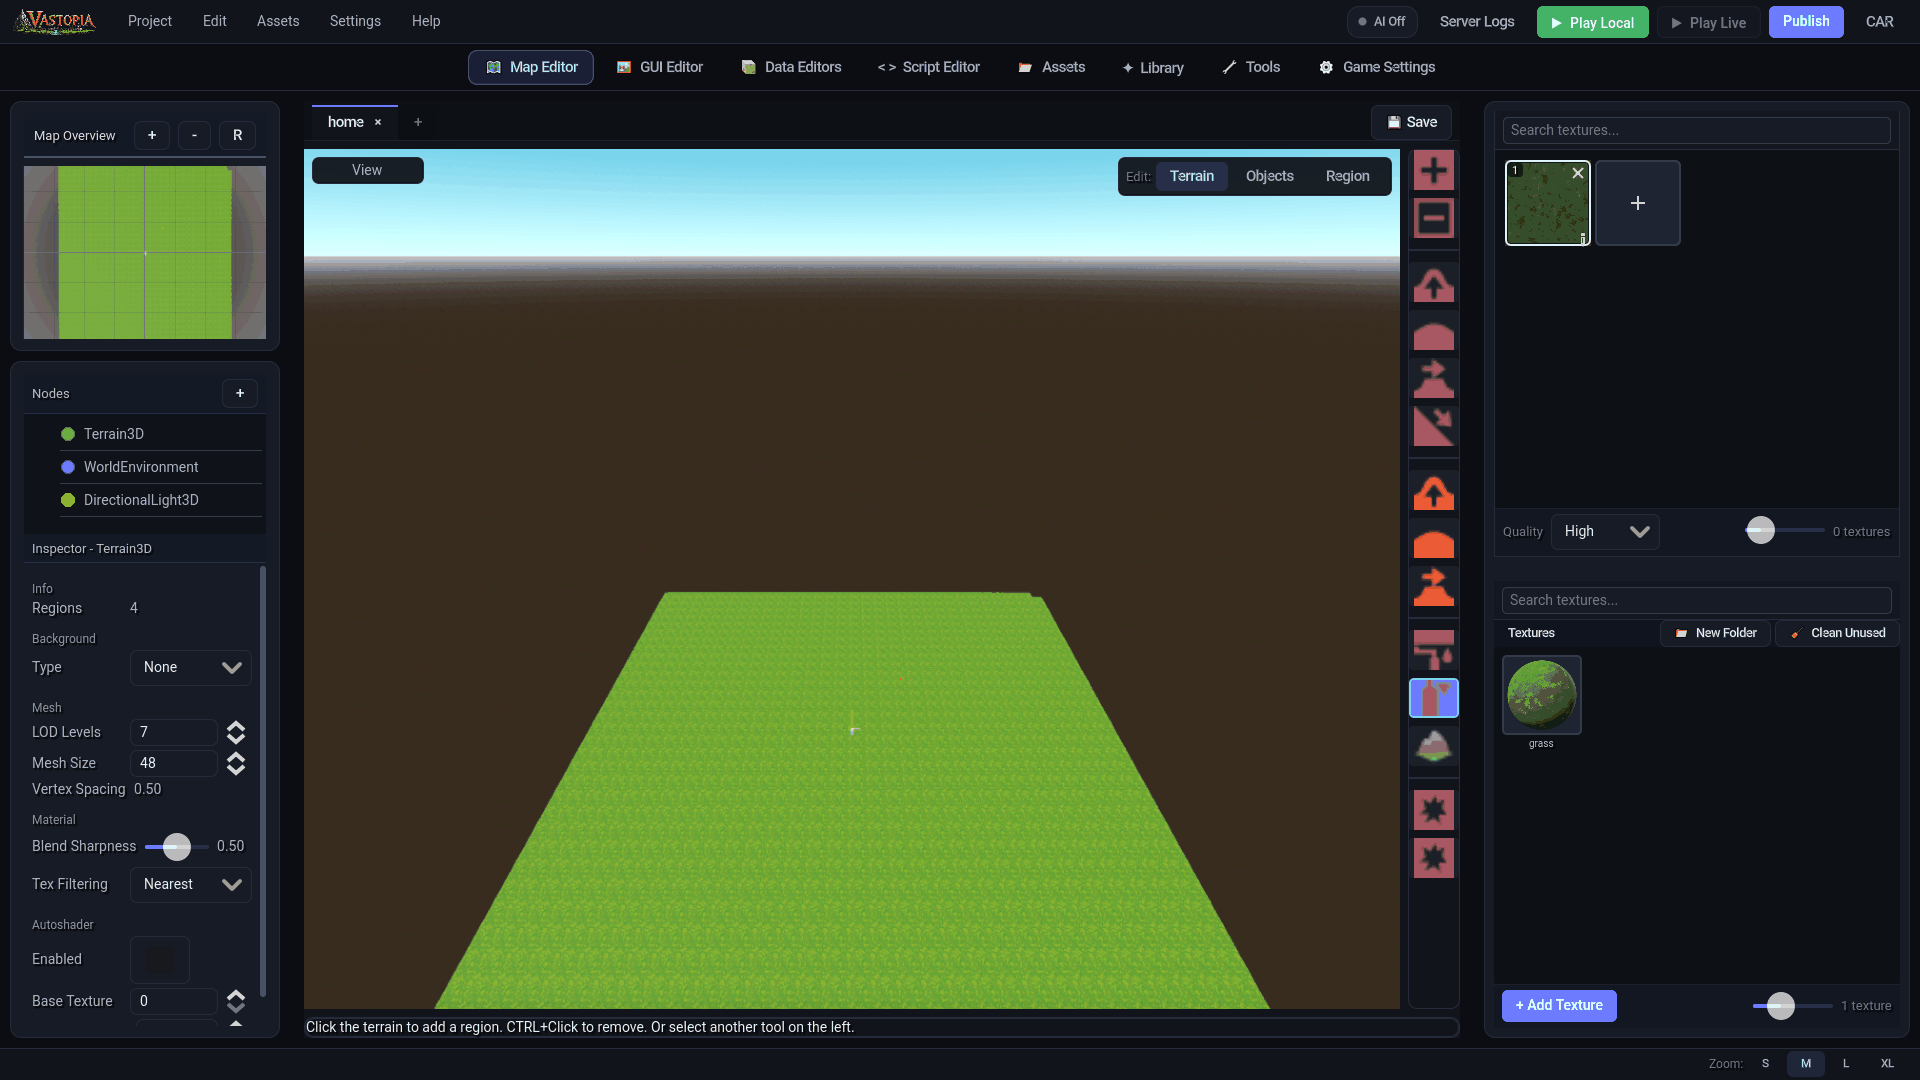
| Band | What is in it |
|---|---|
| Top menu bar | The brand mark and the Project, Edit, Assets, Settings and Help menus on the left; the AI chip, Server Logs, Play Cloud, Play Live, Publish and your account button on the right |
| Mode bar | One button per editor: Map Editor, GUI Editor, Data Editors, Script Editor, Assets, Library, Tools, Game Settings |
| Workspace | The active editor. The Map Editor also shows a left panel with map properties and a minimap; every other editor fills the full width with its own panels |
| Footer | Text-size controls S, M, L and XL |
The window title reads <Project name> - Vastopia Editor. The mode bar and Server Logs are disabled until a project is open, and the layout reflows to any window size; only when the window is smaller than the interface's minimum does everything scale down uniformly so nothing clips.
The top menu bar#
Project menu#
| Item | What it does |
|---|---|
| New Project... | Opens the New Project wizard (Create your first game) |
| Open Project... | Opens the project-folder picker |
| Save Project | Saves every editor that has unsaved work and stamps the project's modified time |
| Save Project to Cloud | Saves, then uploads the project source under its game ID so another signed-in machine can download it. Requires sign-in. See Cloud project sync |
| Close Project | Returns to the project hub, asking about unsaved changes first |
| Project Settings... | Opens the Settings dialog |
| Export Game... | Opens the Export Game dialog, which writes the project's maps, data files and UI to a folder or a single .pck file on your disk |
| Export as Template... | Zips the open project as a reusable template (Templates and gameplay systems) |
| Exit | Quits, asking about unsaved changes first |
Edit menu#
Undo and Redo mirror the keyboard shortcuts and show the name of the action that will be undone (for example "Undo Place Prop"). Cut, Copy and Paste are listed but do nothing in this release.
Assets menu#
Import Assets..., Import 3D Model... and Import Texture... switch to the Assets tab and start an import. Asset Browser switches to the Assets tab; Asset Browser in New Window opens it as a separate window (see below). Refresh Assets reloads the asset database, Scan for Existing Assets registers files already in the project folder, and Optimize Model Textures... opens the texture-cap tool described in Models.
Settings and Help menus#
Editor Settings..., Project Settings... and Theme... all open the same Settings dialog on different concerns. Keyboard Shortcuts... is present but not yet wired; the rebindable keys live on the Settings dialog's Keybinds tab instead. The Help menu lists Documentation, Tutorials, Community Discord, Report a Bug and About Vastopia Editor.
Right-hand controls#
| Control | What it does |
|---|---|
| AI chip | Reads AI Off or AI · <project> and opens the AI assistant configuration. See AI setup |
| Server Logs | Opens the Server Logs view, a live log of the test server that Play Cloud provisions |
| Dev Test, Pack Project, Dev Client | Developer-only. Shown only when the editor runs from its Godot source project; the installed editor hides them |
| Play Cloud | Builds and uploads the project, provisions a temporary test server and launches the client into it. The button itself shows the run's progress |
| Play Live | Launches the client into your deployed game. Disabled until the game is live; the tooltip says why |
| Publish / Update | Opens the Publish Game popup. The label reads Update once the game has a published listing |
| Live badge | Appears next to Publish once the game has a platform ID: green Live (v...) when a version is deployed, otherwise Test |
| Account | Your username and avatar once signed in, or Account to sign in |
Testing and publishing are covered in Test your game and Publish your game.
The mode bar#
Each button switches the workspace to an editor. Editors are kept in memory when you switch away, so switching never discards work and never prompts; what you left open is still open when you come back.

| Button | Editor | Documentation |
|---|---|---|
| Map Editor | Terrain, objects, props, NPC spawns, locations and walkability, one map per tab | Map Editor |
| GUI Editor | Interface screens, the tab bar and the in-game HUD, one screen per tab | Interfaces & HUD |
| Data Editors | Items, NPCs, objects, animations and VFX definitions | Data Editor |
| Script Editor | Server-side C# scripts, schemas and the API reference, one file per tab | Script editor |
| Assets | Import and organise models, textures, audio and other files | Asset manager |
| Library | Browse the public cloud asset catalog and pull assets into the project | Cloud library |
| Tools | The Game Tools hub: Skills Editor, Task Manager, Loot Tables, Shop Editor, Store Tool, Dialogue Editor, Recipe Editor, Location Editor, Combat Scripts, Buff Editor, Special Attacks and Quest Editor | Game Tools |
| Game Settings | Starting map, spawn tile, and the development paths for source checkouts | Game config |
Hover any mode button for a tooltip; right-click it for a longer description of what that editor does.
The Building Editor#
The Building Editor is not on the mode bar. Open the Map Editor, switch the bottom library panel to its Prefabs tab and click the Building button (marked with a plus sign) to assemble a new building in the 3D building sandbox, or right-click an existing prefab and choose Edit Building…. Clicking a prefab on that tab arms it for stamping onto the open map. See Building prefabs.
Unsaved-work badges#
A red circular badge on a mode button counts the unsaved items inside that editor: three dirty maps show 3 on Map Editor, an edited item shows 1 on Data Editors. The badge refreshes every 0.6 seconds and pops in when it first appears. Because editors stay in memory, a badge can sit on an editor you are not looking at; it is the reminder to go back and save.
Tabs and the dirty marker#
The Map, GUI and Script editors keep one tab per open map, screen or file. When a tab has unsaved changes its title gains a trailing asterisk: Home becomes Home*. The Data Editors use the same convention with a space, Bronze Sword *, on each open entity tab. Saving removes the marker.
A script tab can be floated out of the editor: right-click it and choose Undock. The floating window keeps its own dirty marker in its title and saves with Ctrl+S like the docked view. Schema files and the read-only API reference cannot be undocked.
Saving#
Ctrl+S saves the thing in front of you and is handled by whichever editor is active:
| Editor | Ctrl+S saves |
|---|---|
| Map Editor | The map in the active tab |
| GUI Editor | The interface in the active tab |
| Data Editors | The entity in the active tab |
| Script Editor | The script in the active tab (or the focused undocked window) |
| Tools | The table or task editor currently showing |
| Building Editor | The building being assembled |
To save everything at once use Project > Save Project. Quitting or closing the project with unsaved work raises an Unsaved Changes dialog listing the dirty tabs by name, with Save, Don't Save and Cancel.
Autosave#
Autosave is off by default. Turn it on under Settings > Editor Settings... > Editor > Files & Saving > Autosave, choosing Every 2 min, 5 min, 10 min or 20 min. At each interval the editor saves every editor that has unsaved changes, the same as Save Project.
Undo and redo#
Ctrl+Z undoes and Ctrl+Y or Ctrl+Shift+Z redoes, in whichever editor is active. The Edit menu shows the same commands with the pending action's name.
Undo is scoped to the editor, and in the Map Editor to the map:
| Editor | What undo covers |
|---|---|
| Map Editor | Per-map history: placing and deleting NPC spawns, objects, locations and other region elements; placing, removing and batching props; each prop paint stroke as one step; each terrain sculpt or paint operation; each walkability-flag stroke or smart fill. Switching map tabs switches to that map's own history |
| GUI Editor | Edits to the open interface |
| Data Editors | Edits to the open entity |
| Script Editor | Text edits in the code view |
| Tools | Table edits; the Dialogue Editor keeps its own per-dialogue history |
| Building Editor | Piece placement and edits in the open building |
The Assets tab, Library and Game Settings have no undo; their changes are written as you make them.
Navigation history with the mouse side buttons#
The editor keeps a browser-style history of where you have been: the editor plus the tab that was open in it. The two side buttons on a mouse step back and forward through it, from anywhere in the window. Stepping into an entry switches to that editor and re-selects the recorded map, screen, script, entity, tool or asset category, provided it is still open; a closed tab is skipped. The history holds the last 100 stops. Tracked editors are the Map, GUI, Script and Data editors, the Tools hub (including its main menu), the Assets tab and Game Settings.
The Settings dialog#
Open it with Settings > Editor Settings... (or Project Settings..., Theme..., and Project > Project Settings...). The dialog is titled Settings, has three tabs, and applies every change immediately; there is no Apply button, only Close.
Editor tab#
| Section | Settings |
|---|---|
| Appearance | Color scheme: Indigo (the default), Teal or Amber. Only the accent changes; layout and type stay the same. UI animations toggles hover, press and transition effects |
| Viewport | Zoom speed, Pan speed, Camera speed, Slow camera speed (while holding Shift), Orbit sensitivity, Invert orbit (vertical), Invert scroll zoom for the map viewport |
| Rendering | Quality preset (Performance, Balanced, Quality) sets everything below at once: Render scale, Anti-aliasing (MSAA) (Off, 2x, 4x), Temporal anti-aliasing (TAA), Ambient occlusion (SSAO), Indirect lighting (SSIL), Reflections (SSR), Global illumination (SDFGI), Glow / bloom, Volumetric fog, Shadows, Prop shadows |
| Files & Saving | Autosave interval |
| Source Checkouts | Server project and Client project paths for developers; see Install the editor |
The rendering settings only affect the editor's viewport, never the published game. Prop shadows and global illumination are the expensive ones on dense maps.
Keybinds tab#
The Keybinds tab lists the Map Editor's rebindable shortcuts, grouped as Edit Modes, Terrain Tools, Object Tools, Camera and Placement. To rebind one:
- Click the key button next to the action. It reads Press a key….
- Press the new key. Modifier keys on their own are ignored;
Escapecancels. - The binding applies at once. Reset to Defaults restores every key.
The same key may be shared by actions used in different contexts: by default E and Q move the camera up and down while flying and rotate a prop while placing. Defaults for every action are tabulated in Keyboard shortcuts; the edit-mode keys are F1 Terrain, F2 Objects, F3 Region.
Project tab#
This tab needs an open project. World holds Max world size, the largest map footprint per side in world units (0 means unlimited; larger maps warn on save). New Map Defaults presets the Terrain type (Empty, Flat Grass, Hills, Mountains, Desert, Islands) and Lighting theme (Daylight, Sunset, Night, Overcast, Dawn) offered by New Map. The Project section shows the name, version, Platform game ID (or "Not linked") and folder location.
Text size#
The footer's S, M, L and XL buttons scale every label and control in the editor: 14, 18, 22 and 26 px respectively. Medium is the default. The choice is an editor setting, so it follows you across projects.
The asset browser in its own window#
When you have a second monitor, the Assets tab can live on it. Either choose Assets > Asset Browser in New Window from the menu bar, or click ⧉ New Window on the Assets tab's toolbar. A second asset browser opens as a real operating-system window titled Assets — <project>; the copy inside it carries a Dock Back button to close it and return to the tab.
Where to go next#
- Make a map: Map Editor overview.
- Add content: Data Editor overview.
- Play it: Test your game.
- Look up every key: Keyboard shortcuts.